Showing posts with label Owl Spotlight. Show all posts

Tuesday, April 27, 2010

Owl Spotlight: JamieLeto

I started jamieleto.etsy.com in 2007, about 3 years ago, and within the past three years my shop has been opened, closed, reopened, reinvented, you name it. I began with sewing little stuffed monsters to knitting scarflettes to making jewelry to writing cut-paste zines and everything in between.


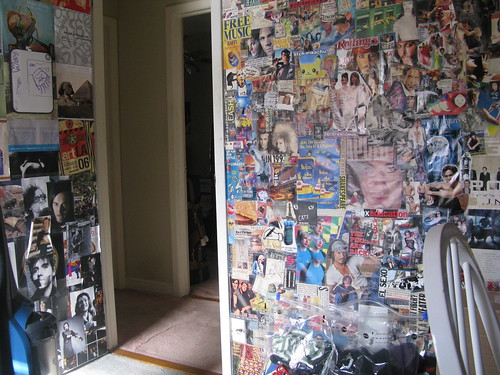
Despite having loves of all different DIYs and dabbling in each category and finding my temporary niche in each one, it was always sort of an underlying dream of mine to be making decoupage creations. For the past 6 years I've been an avid collage maker, and have collaged entire walls with pictures I've hand picked. I just find it so interesting and rewarding for some reason I can't explain. This year I finally found it in me to dedicate my shop to decoupaged creations.


Last christmas I made my boyfriend a decoupage frame with little green triangles that took me forever but I loved the outcome. I really just enjoyed doing it and the meticulous nature of it; just putting pieces together, like a puzzle. I just sort of fell in love with decoupage. So after being on a shop hiatus for a while, I began to create more and more and decided to get back up and running again. I chose the name mélange, which means collection, because I think of these collaged products as a collection of ideas because I think that's what magazines are: collections of photos, words, ideas.


Aside from just doing what I love, I'm happy to do it with recycled products. With my collaging addiction I have tons of old magazines lying around and now I've found an awesome, profitable, sustainable way to use them. If you're interested in getting rid of any old magazines e-mail me at jamieleto@hellokitty.com . Depending on the amount I may be able to take them off your hands as long as you are willing to pay shipping.


thanks for reading owls (:


http://jamieleto.etsy.com

Wednesday, February 17, 2010

Adventures in Dyeing with Suenosdejmi ( Owl Spotlight )

I've spent the last good while coveting and drooling over handdyed yarns. Gorgeous colorways and combinations of color that make me go oooooh....anyone who knits or crochets has been there. But they're always sooo expensive! Sure, they're worth it, but we can't all shell out that kind of money. I definitely can't.
After running across the fact somewhere that people dye with Kool-Aid, I decided to work up the courage to try it myself. That time's finally come.

Before I was ready to attempt it myself, I've spent a good amount of time gathering resources. It's helpful to know what direction to go in before you try it out. Some really handy tutorials are over at Knitty KnitPicks and a pretty useful tutorial over at A Beautiful Life

I read and reread these articles, and others, and visited some groups on Ravelry, just trying to soak up the details of how to do it. When I started earlier, I discovered very quickly that this isn't like knitting, there's no pattern. There's just what to do and what not to do, and then you, your yarn, and the colors you choose. Everything else just happens as you go along.

I decided to approach it in small doses by test dyeing only a little at a time. My method would be microwave dyeing. My first attempt was overdyeing (dyeing a yarn that is already colored) some Patons Classic Wool Merino, a bit over 2 yards. Mine was a light blue when it started out.

I soaked it a bit then tried the hand-painted approach, I put it out on a grocery bag and dabbed it with bits of grape, lemon lime, and black cherry. Now, I learned the hard way that you want this yarn to be fairly damp when you do this, and when you go to microwave it, for the love of God don't add it to water! (which I might or might not have actually done...)

The result was (okay, so I did that, duh..) that the colors ended up seeping out into the water, and swirling around a bit as the yarn soaked up the dye, so I got a bit of a heathered look. I like it, but it wasn't at all what I wanted.


At this point, my water wasn't clear. It actually wasn't anywhere close to clear. I wondered what would happen if I took my second yarn (Condon's Wool in a very light tan color) and just added it to the purple-ish water. I took a little bit (7 yards) and just plopped it in there, and put it back in the microwave for a few minutes. The color instantly took to this yarn (this is obviously the winner yarn here). I had a solid very light purple red yarn. What would happen if I handpainted some green on it?

I made sure the yarn was very damp, and very gently added small amounts of green to it in sections around the loop. then i spooned a bit more water on it to help dampen it, and put it back in the microwave (without water added, obviously!)

This was that result:


By testing, I learned that it works best for me to get a solid color then try to add others to it, but would that work for a lot more yarn? This third dye is about an ounce, I think. It came as an addition to my 4 oz skein of Condon's. (I'll measure it for sure when it's dry and ready to ball up, so we'll know for sure then)

First I soaked it for about 20 minutes in just warm water, to allow it to get really damp. Be careful not to use too hot water, or to agitate it in hot water, as you'll felt your yarn.


Then i removed the yarn from the water, mixed in some black cherry koolaid (about a tsp) and added the yarn again. The websites all say that it doesn't matter how much water you add, as it doesn't dilute the dye any, it's all about the amount of powder to the amount of yarn. I've been using small amounts because I'm dyeing small amounts, most sites recommend a packet of koolaid per ounce of yarn.

I put my yarn back in the microwave for 2 minutes, then let it sit in the microwave for about 5 minutes, and then repeated the process again. The next time, I took some grape, about half a tsp, and added it only to the part of the water in the middle and mixed it a bit, hoping to get a darker turnout in the middle.  This is the time where I added the grape.


Overall I repeated the microwave process about 4 times (over the commercial breaks of LOST) until the water was clear. All the tutorials say that the water will be clear, and boy was I shocked to see that it was actually clear!

This is the end result:

From what I can tell, the grape didn't really take in the middle, it probably just blended in with the overall coloration.

Now, because I can't be ultimately happy with one gorgeous solid color, I had to take it further. While soaking the yarn in some water, I took two coffee cups and mixed some dye in them, one grape, the other lemonlime.

From my second testing, I remembered the black cherry taking the lemon lime well. So I decided to see how well it'd take it. I put about half a tsp of dye in each cup, and making sure the yarn that wasn't in a cup was really damp, put it back in the microwave for 2 minutes.


After two trips through, I brought it out and covered it with the pyrex dish (that the cups are sitting in) and let the yarn steep a bit. After about 10 minutes, it had soaked up all the green dye (with little result) and was working on the purple dye. I added the rest of my green koolaid (about another half tsp) and put it back in the cup and put the pyrex dish back on top. About 10 minutes later, the water in both cups was almost clear, and I had this:


The green isn't entirely saturated all the way through, but it's a nice representation. The darker end is a bit of a light purple. I'm quite pleased with the end results, and can't wait to try some more!!!

Saturday, November 7, 2009

Owl Spotlight: Suenosdejmi

I've wanted to recycle my own yarn forever, but I haven't had the courage to try it before now. I found this really excellent tutorial on the process the other night and summoned up the courage to try it. I went out thrifting yesterday and found this glorious sweater at Goodwill. The yarn's a 60/40 Cotton/Acrylic mix, and the colors are dreamy. Plus, it only cost me $2! (sorry, the picture's icky!)


When shopping, I checked for 1)types of seams 2)weight of yarn (I really wanted heavy worsted yarn, lots of sweaters are made with smaller yarns and I didn't want to go that way on the first try) 3)price (because why pay a lot for it when I don't have to!)

If you want to try this yourself, it's important to know what to look for before you get started. There are only certain sweaters that can be unraveled, some can't be due to the way they were constructed. Look at the tutorial above which shows really good detail example of the types of seams to look for. Once you get that down pat, the rest should be easy.

So, I've got my sweater with the right seams, and I started unraveling. The tutorial says to cut it, but I'm kind of a chicken, so before I started cutting, I spent some time with a small crochet hook unlacing it a bit. You can see the fine thread that the sweater's sewn together with, and once you know how to look for it, it's easy to cut. The sweater pulls right apart.


When I got to the sleeve section, I found that the sleeve would come straight out, just like frogging stitches. This is the hole where the sleeve would be attached.


After the sleeve is seperated, I went across the shoulder and around the collar. The collar was horrid! At this point I've figured out that the stitches used to connect all the pieces are slip stitches, and that if you can find them on the side and cut every few stitches, it comes apart easier and you run much less risk of cutting the sweater yarn. Once I finished the neck, I went across the other shoulder, back around the second sleeve, and back down the other seam.

Here are the 4 pieces, two sleeves and the front and back panels.


After this, I looked around for a corner, found a tied off spot, and started unraveling. :) This is the yarn from the front and back panels, I'm guessing it's about sport weight.


I haven't unraveled the sleeves yet. I'm excited about giving this sweater new life. I'm thinking the yarn shown here will be a nice scarf, double stranded, and the sleeves could definitely make some gloves. It's sooo soft, so some nice stuff will come from this.

I love the process and will definitely do this again! :)

Wednesday, September 16, 2009

Owl Spotlight: suenosdejmi: Owlie Rendez-Vous

In August, I took a trip to meet some fellow Owlies (yep, yep!!).


Kristen of KnitandPearl and I flew out to Denver to spend a weekend with Amanda of PresentsforPirates. We planned the trip forever, and when it came time for me to get in the car to go to the airport it didn't seem real.

I was *sooo* nervous to meet them in person. I've known Kristen online for over two years now, and Amanda for at least a year, but meeting someone in person is so much different. What if they realized I'm the biggest dork ever, and allowed that to stop them from liking me?


I left around 2 am to go to Nashville to get on a direct flight to Denver, and got there around 8 am local time. I spent a bit of time in the airport by myself, then Amanda came out to meet me. We people stalked for a while before Kristen arrived, and then stalked her around baggage claim before she realized who we were. :) After meeting Santa in the airport parking garage (thanks Santa for giving Amanda her car back!) we were off!


Since we're crafty girls, we had several crafty things planned for the weekend. We went to Ceramics in the City (great place, two thumbs way up!) and hand-painted some ceramics. The place doesn't charge a studio fee, so we got to sit around all afternoon and paint our pieces. The we left them there, where they were fired, sealed, and then the next week in the mail on the way to us. Amanda painted a Pirate Mug, Kristen painted a Whore tea cup and saucer, and I painted a little blowfish (Hootie). Here are some fun before pictures.


Man's Pirate Cup


Kristen's Whore Cup


Hootie, my blowfish (the shop named him that, not me!)


I don't have a good after picture of Hootie or Kristen's Whore Cup yet, but Amanda so kindly provided me an after-shot of her Pirate Mug. I had never painted ceramics before, so I wasn't sure what to expect. The colors turned a lot darker, the surface somewhat glossy, and the before pieces all had a powdered feel to them that doesn't exist now.


We also took a scenic tour of the local area craft stores, hitting up a local yarn store, then a Joanns and a Michaels. We got yarnie goodness, and some scrapbooking supplies so Man could help Kristen learn to spell and I make project journals. This is a pretty bad picture, but it's my project journal. I've never really made anything paper crafty either, and well, Man did all the binding work, but I'm still proud of using those stamps! :)

We also did some touristy good fun stuff, and I'd say overall I really liked the little look I got at Colorado, and had a rockin' good time with my fellow Owlies. Where shall we go next, girls?

Myself, Man, and Kristen at Red Rocks, where we tried to sneak into a concert went to see the view. There's more pictures and random fun on my blog and also on Facebook.

Friday, August 7, 2009

Owl Spotlight: RemixStudio

Switching Crafting Gears

Unfortunately, I'm known for not having the best "follow through" if you will. I have a habit of starting projects, and not finishing them. Or getting bored with projects and wanting to do something else.

I've recently fallen into the later. I'm absolutely bored with sewing (for a variety of reasons that I won't go into here.) It's bound to hit everyone at some point, to certain degree. So what do you do? Or at least, What did I do?

I found something else that interested me. I knew how I got bored easily from the start and didn't corner myself into one type of project, which was nice.As I started to get bored, I realized I had other things that I liked doing. I realized that I had dozens of old art drawings and prints from college, that I in all honesty I had no intention of doing anything with. I then worked to turn all these prints into ACEOS (Art Cards Editions and Originals )


While I have no intention to stop sewing things out of tshirts (I've got too large of stock to do that) switching to something different for a while had been the break I needed. Don't be afraid to try something different for a short time (or long time if you so choose.) It can be quite refreshing!

Wednesday, August 5, 2009

Owl Spotlight: RaynaE

I have really started to hit my stride as a knitter, and it couldn't have come at a better time! I've been knitting and crocheting like a mad woman, and, if I may say so, I've made some pretty darn good stuff. I've really taken a shine to knitting. I think it's my new favorite. :) I always have multiple projects going at the same time so I don't get bored, but I am DETERMINED to finish things. I have this new rule where I can't start a new project until I finish something else. It mostly holds true. I've actually been doing pretty well with it, but I NEED to have more than one project going at a time or else I'll go stir crazy! So below are some of the things I've finished! Hurray for finishing things!


Here we have a bedtime hat modeled by the lovely Pooky Bear. It was crocheted using the finest baby yarn and will flatter your baby's head in every season as well as serving its noble purpose in keeping his or her head cozy warm.


Not modeled by anyone (or thing) but still fabulous are a pair of baby leg warmers. These were knitted with the softest lace yarn in the most vibrant of colors using beautifully handcrafted wooden extremely tiny knitting needles. They were worth the work, however, because baby is sure to be the most stylish in a diaper-padded onesie.


Our model Pooky Bear is now ready for snowtime frolic as he sports his Alaskan wilderness mountain hat. It was crocheted with care and love and the thickest and warmest yarn to be found. Pooky Bear is sure to be the one to enjoy his time in the snow the longest in his cozy ear flaps.


Finally, you will see an amigurumi giraffe to match any baby's jungle-themed room. It is made out of soft cotton yarn and has no hard or sharp parts so your baby can enjoy all his or her time chewing on it until they are ready to chew on something else.

Of course, there are other projects I'm working on, such as a couple baby blankets and a cute little baby sweater. So there's a theme here, right? Baby things... hmmm... well, they're small and awesomely easy and quick to knit or crochet. That's definitely a plus. And they're cute. You can never have too much cute stuff. And... we're pregnant! (my husband and me, that is) And I say we because I'm not letting him off the hook that easy. :)

*No Pooky Bears were harmed in the photographing of these products. As a matter of fact, I couldn't have asked for a more cooperative or cute little model.

Tuesday, August 4, 2009

Owl Spotlight: GypsyEye Studio

I have decided to begin having a bi-weekly giveaway on my blog. Go check out Gypsy Eye Studio on Etsy , then leave me a comment on my blog about your favorite item and why you adore it. Your comment on my blog enters you into the giveaway. On August 15th I'll randomly choose a name to decide the winner.

Please be sure to leave a way for me to reach you if you're not a Blogspot user (Myspace, email, Twitter, Etsy shop, etc)!

The lucky winner will receive.........


Their own set of Alexis Barrettes and a special surprise from Gypsy Eye Studio.


Editors Note: Please make sure you comment on GypsyEye's blog, not here, if you wish to enter the contest. Comments here will not be entered into her contest. Good luck all!

Saturday, August 1, 2009

Owl Spotlight: KatsCozyKrafts

Kathie Brechbuhler has been on Etsy for a year. Her shop is needlework of all types. The name of her shop is Kats Cozy Krafts. She goes by Kat online. She is a retired Spanish teacher living in Allen, Texas. She found out about Etsy from a friend who works at Hobby Lobby. She said I loved to sew so much I should get on Etsy and show off my projects. So I did.

She recently joined the Owls. She waited to join and is glad you chose her! She enjoys our challenges sooo much she doesn't do regular shop projects anymore. They're boring compared to what you all come up with. She is a buyer and a seller. She does cross stitch, crochet, punch needle embroidery, counted cross stitch and other crafts on linens and afghans, hats, scarves, pins, magnets, pin cushions and more.

Her proudest piece to date is her counted cross stitch of the girl and the goose "Love is Blind" It's her first "counted" cross stitch and she struggled with it and swore she'd never do another one. Bet there are a few of you who felt the same way the first time. But she's working on a second. Another precious moments design of two young sweethearts. It's going better. For one thing she's using 12 gauge Aida fabric. The smaller the number the fewer the holes and the easier to see. Even so, she still uses a standing magnifying glass to do it. She entered her "Love is Blind" in the Owls Summer Color challenge. She's really proud of it.

She has a new blog that's bare. She hasn't had time to get it together with all her travels this summer and the many challenges she's been getting ready for. Etsy Tx has had four she's finished this summer besides ours on the Owls. Anyone who has talent with blogskins, let her know, please.

Here are some recent pics of her travels to Chicago and SanFrancisco and of her pups and of course her hb. Also, her cross stitch she's so proud of.


Sunday, July 5, 2009

Owl Spotlight: LucidMoonStudio

This is my first post, and I wasn't quite sure what I should blog about, but then I decided I would write about my dog, Cooper. Cooper is a Weimaraner, and he is 9 months old. He is such a good dog, so I decided he deserved some really good treats. I found a recipe in Cooking the Three Dog Bakery Way by Mark Beckloff and Dan Dye, the owners of the Three Dog Bakery (Cooper's favorite store, by the way!).

You can check out the book and recipes on Amazon here. I decided to make Belly Rub Brownies because what dog wouldn't want these?! Here is the recipe:

Belly Rub Brownies
1 1/4 cups all-purpose flour
3 tablespoons carob powder (I bought
mine at the health food store)
1/2 teaspoon baking powder
1/2 cup canola oil (I didn't
have any, so I used vegetable oil instead)
3/4 cup honey
2 large eggs

Preheat oven to 350 degrees.
Coat an 8 x 8 inch baking pan with nonstick vegetable spray. In a
large bowl, combine flour, baking powder and carob powder. In a
smaller bowl, whisk honey and oil together. Add eggs one at a time,
whisking after each. Add the wet ingredients to the dry and combine
well. Spread the batter into the baking dish. Bake the brownies for
20-25 minutes or until set. Let cool to room temperature, then cut
into squares.
Store in an airtight container for up to 4 days or wrap
and freeze for up to 2 months.


Wet and dry ingredients

Ready for the oven! I tasted the batter, while
Cooper got to lick the spoon, and we both agreed it was yummy even
before baking!

Ready to eat!

Are those for me? Really? Is this a
joke??

I will do ANYTHING you
want...ANYTHING!!

Can I has just one more?
PLEASE!!

As you can see, Cooper really enjoyed his treats! I have to say, he never performs his tricks as well as when I am holding one of these brownies! If you have a dog, I hope you try
these yummy treats, and if you don't, surely there is a neighbor with a dog who would love these! Enjoy!!


Thursday, July 2, 2009

Owls Spotlight: AlphabetDiva

I love to take pictures, and I always have, so it only made sense to me to start a business taking photos. I have been focusing on taking photos of everyday items that look like letters of the alphabet. Now that is not as easy as it sounds, I mean go out and find the letter G, and then find one in nature, sports and architecture! So it takes a keen eye to find these letter photographs. I started out like most, finding the easy letters, the B’s and L’s using windows etc. and slowing sharpening my focus to find the harder letters, and items not normally scrutinized , like a baseball glove and a garden gate.


Now I see letters everywhere I look! I am always taking pictures, and have actually had people come up to me and ask me why I am taking pictures of them, and I have to explain that I am taking pictures of the basketball court floor, (weird I know) . Some others have asked if I was from the Health Department (taking close ups of the water fountain at my child’s school), or maybe I am from the bank because I am outside taking a picture of their garage door or the shutters on their house!


Recently my girls have started whining every time I pull the car over to take a picture of a telephone pole or tree knot, “Mom, please”, I hear from the backseat, “ I hate stopping all the time” the exclaim! Hey is it my fault that it takes twice as long to get anywhere these days? Well yes I guess it is, but I can’t seem to break my LETTER PHOTO ADDICTION!


Tuesday, June 30, 2009

Owls Spotlight: Icky Dog

So we celebrated my husband's birthday this weekend and one of his presents inspired me. He received a book titled The Truth About Chuck Norris - 400 Facts About The World's Greatest Human. This book is filled with hilarious "facts" about Chuck Norris. Here's a few, to show you what I mean:


When monsters go to sleep, they check their closet for Chuck Norris.


Chuck Norris makes onions cry.


It never rains on Chuck Norris.


A cobra once bit Chuck Norris's leg. After 5 days of excruciating pain, the cobra died.


Every piece of furniture in Chuck Norris's house is a Total Gym.


Chuck Norris can charge a cell phone just by rubbing it against his beard.


I've heard some of these "facts" before, and always thought they were hilarious! So I figured hey! Lets see what kind of Chuck Norris goodies I can find on Etsy! Sadly, not nearly enough!


Actually, Chuck Norris isn't God, but he does beat God at golf. This button is from indietrinkets.


And Chuck Norris can turn back time simply by staring at a clock and flexing. This vinyl wall decal is from willocreeksigns.


There is no chin behind Chuck Norris's beard. There is only another fist. This cute t-shirt is from jamjamtees


Chuck Norris flosses with barbed wire. This fun art poster is from revolutionoise.


Hope you all enjoy this as much as I do! If not, Chuck Norris will roundhouse kick your head!

Friday, May 29, 2009

Owl Spotlight: IckyDogCreations

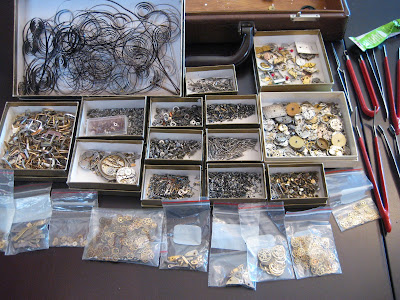
My Grandpa was always such a crafty fellow. He could make something out of nothing and loved using found objects (halved walnut shells as scary fingernails on a giant hand, pistaccio shells as weird little singing faces . . .). My favorite of his creations were his watch sculptures. He would take apart watches and use the gears and springs and whatnot to create intricate sculptures of trains, motorcycles, and castles. I was in awe of the detail. (and I wish I had some pics to share!)


When my Grandpa died, he left all of his watches and watch parts to me. They sat in my basement for the longest time. I had no idea what to do with them. Then one day, about 3 months ago, I decided to try my hand at making a watch train. How hard could it be, right? Um, HARD. I tried and tried, to no avail. And it didn't help that I was trying to hold the pieces together using a glue gun (FYI: glue guns = not a good choice for gluing metal!). I was disappointed. I was annoyed. Heck, I was angry! My hubby, not wanting me to be in a fowl mood (probably a good thing - I tend to cuss like a sailor when I'm mad!) suggested we buy some epoxy to try. He also suggested to make something other than a train (since it obviously wasn't working out).
So I started with an owl. Some of the gears reminded me of the eyes of a great horned owl. And he turned out pretty cute! I was digging through the pieces and noticed one reminded me of a hummingbird. So I made one. Another piece looked like a dragon head, a robot, a cat . . . and so started my watch sculpting.


And the epoxy works much better than a glue gun!
This is the latest owl I'm working on. You can see others in my etsy store!


Ickydogcreations, sometimes known in the real world as Cami, is one of our newer Owls, jumping on board in the last few months. She's taken to us quickly, and has found she fits right in! Get to know her better, by checking out her blog and also by visiting her Etsy shop


LinkWithin

Related Posts with Thumbnails